🧰 Looking to give your PC a fresh, lightweight, and supercharged version of Windows 11? Look no further than Windows 11 Ghost Spectre 64-bit — the debloated, performance-focused edition perfect for gaming, low-end systems, or minimalist setups.
Here’s a full installation guide that’s beginner-friendly, secure, and optimized for performance.
⚠️ Disclaimer
🚨 Important: Windows 11 Ghost Spectre is an unofficial, third-party modified version of Windows.
📋 What You’ll Need Before Installation
Before starting the installation process, make sure you have the following:
🗂️ 1. Windows 11 Ghost Spectre ISO
- ✅ Download the latest 64-bit ISO file from trusted sources such as forums or the developer’s page.
💿 2. USB Flash Drive (8GB or more)
- Needed to create a bootable installation media.
🛠️ 3. Rufus Tool (Free)
- Download from rufus.ie
- Used to write the ISO to your USB drive.
💻 4. Compatible PC
- Meets the minimum requirements for Ghost Spectre (2GB RAM, 1GHz CPU, 20GB storage).
- ✅ TPM and Secure Boot are not required.
🔧 Step-by-Step Installation Guide
🔹 Step 1: Download the Ghost Spectre
📥 You can get it here with link provided above or Head to a trusted community source or the official Ghost Spectre and download the latest Windows 11 Ghost Spectre 64-bit ISO.
💡 Pro Tip: Choose the edition that fits your needs (Compact, Superlite, or Superlite SE).
🔹 Step 2: Create a Bootable USB with Rufus
- Plug in your USB flash drive
- Open Rufus
- Select your USB device
- Click “SELECT” and browse to the Ghost Spectre ISO
- File system: NTFS
- Partition scheme: GPT (for UEFI) or MBR (for Legacy BIOS)
- Hit Start
⚠️ This will erase all data on your USB drive.
🔹 Step 3: Boot from USB
- Restart your PC
- Press the boot key (usually F2, F12, Esc, or Del)
- Choose your USB drive from the boot menu
🖥️ You’ll now enter the Windows 11 Ghost Spectre setup environment.
🔹 Step 4: Install Windows 11 Ghost Spectre
- Select language, time
- Choose Windows 11 Ghost Spectre Edition:Compact, Superlite, or Superlite SE
- Click Agree with license terms
- Choose “Custom Installation” (Advanced for fresh install)
- Select Target Partition to install Ghost Spectre (delete or format old ones as needed)
- Click Next to begin the installation
- Select the partition where you want to install Windows
- Follow on-screen steps to complete the setup
💡 Installation usually takes around 10–15 minutes depending on your system speed.
🔹 Step 5: Post-Installation Setup
Once installation is complete:
- 🧰 Run Ghost Toolbox (often included) to install or re-enable features like:
- Driver Updater
- Microsoft Store
- Converter
- Video Player
- Browsers
- 🎮 Optimize system settings for gaming or productivity
- 🌐 Connect to Wi-Fi or Ethernet and check for driver updates manually if needed
🎯 Installation Tips
- 🛡️ Turn off antivirus during installation to avoid ISO corruption
- 💾 Backup your data before wiping partitions
- 📦 If drivers are missing, use tools in the ghost toolbox
- 🔧 Use a VM (Virtual Machine) first if you want to test before full install
🧠 Who Should Install Ghost Spectre?
✅ Ideal for:
- Gamers seeking maximum FPS
- Low-end PCs/laptops with weak specs
- Tech enthusiasts who want full control
- Users tired of Windows bloatware and telemetry
🏁 Final Thoughts
Installing Windows 11 Ghost Spectre 64-bit is a smart choice if you want a clean, fast, and responsive system. Whether you’re a gamer or just hate bloat, this version delivers performance without compromise.
🔧 Just follow the steps carefully, use trusted sources, and your PC will feel brand new!
@mainthebest.com
 Windows 10 vs Windows 11 (Ghost Spectre Comparison) 🆚
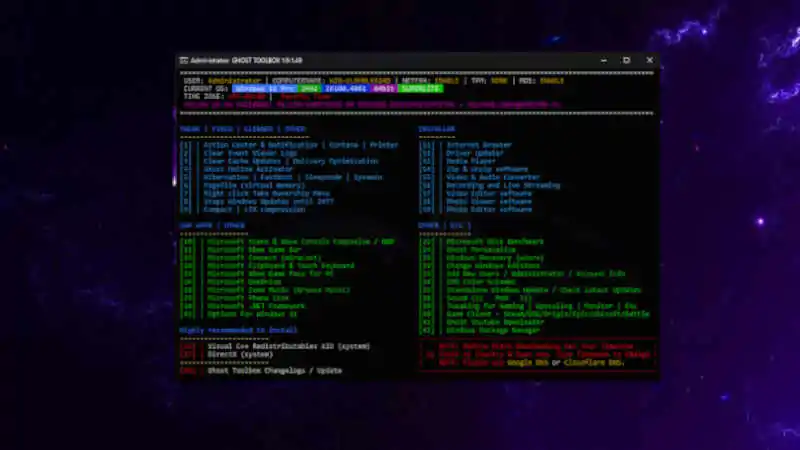 The Utility Suite: Ghost Toolbox for Windows 10/11 Ghost Spectre 🧰
 Download Lightweight Build Windows 11 Ghost Spectre 64-bit 📥
 Windows 11 Ghost Spectre 64-bit (Compact, Superlite & SE) 🖥️